In 2016, integrating CodeKit 3 with PatternLab 2 offered developers a powerful combination. CodeKit served as an all-in-one tool for preprocessing, linting, and serving files, while PatternLab provided a robust pattern library system. This integration streamlined the development process and improved efficiency.
Both have likely evolved significantly since then. This article is preserved for historical context, consult current documentation for up-to-date integration methods.
Both platforms have been rebuilt and gained much speed compared to the previous versions. The setup is different from previous versions.
I like to control how the final CSS is generated. I prefer to have as few dependencies as possible, and having CodeKit as a debugger, code processor, and server is convenient and saves time and cognitive resources.
With no further introduction, here’s how to get them working.
Download and set up PatternLab’s environment. I use PatternLab’s PHP Mustache edition for development. I used Composer to create the new project.
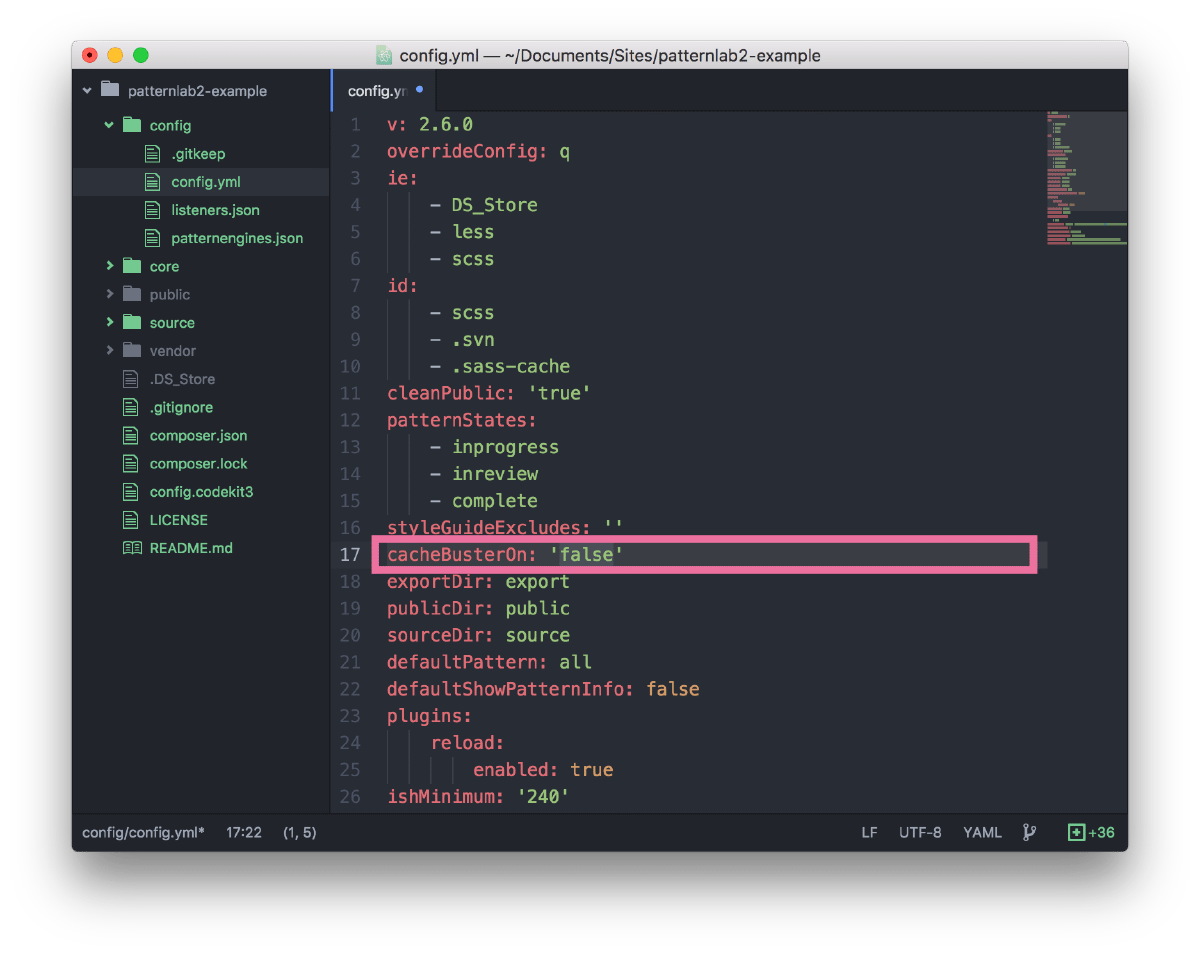
Update PatternLab’s settings by opening /Project/config/config.yml and setting cacheBusterOn: ‘false’ to keep processing fast and update only relevant public HTML files. This is especially important if you are using version control.

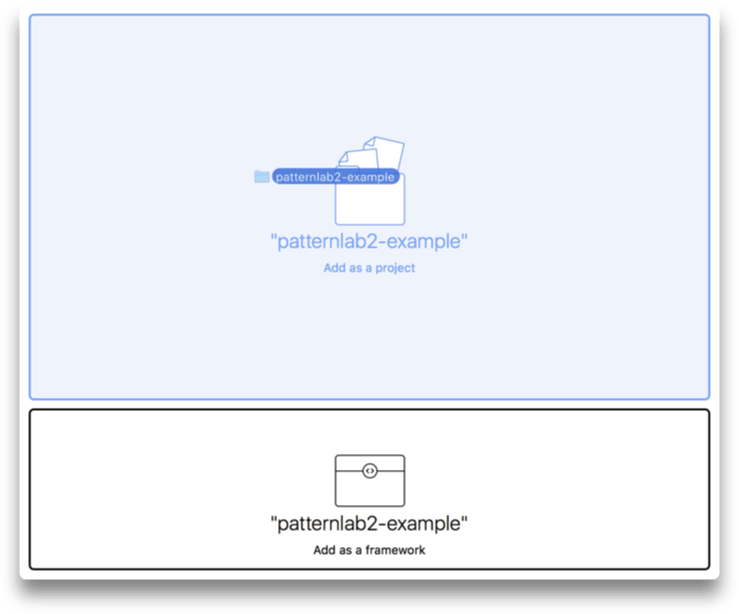
- Drag PatternLab’s folder to CodeKit as a new project.
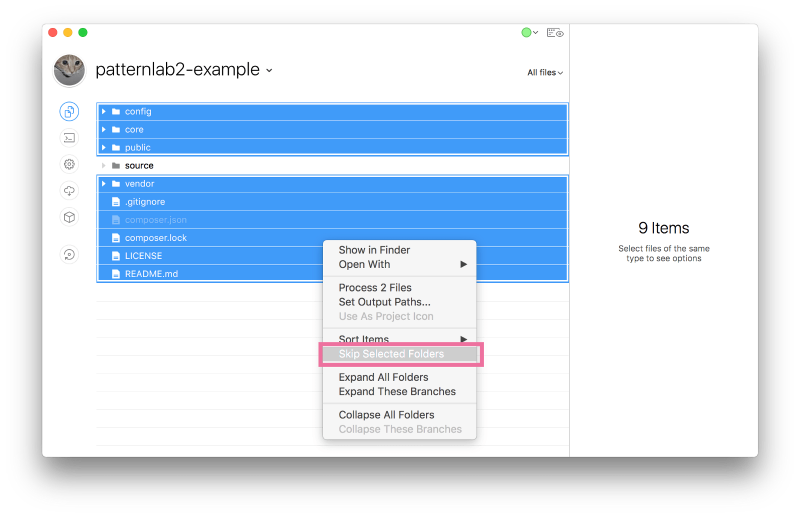
- First, skip all the files except “Source”
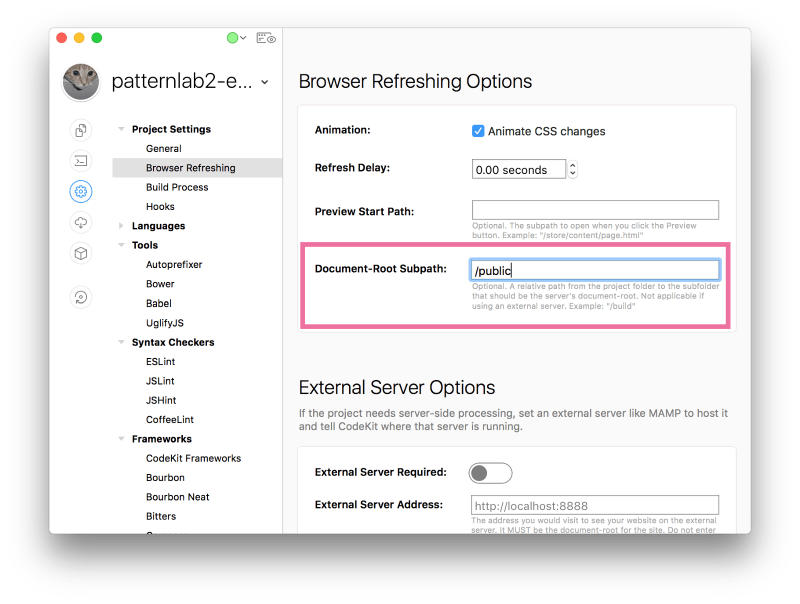
- Browser refreshing set Document-Root Subpath to /public
Design leadership insights in your inbox
Bi-weekly from my practice. Quarterly exclusives from my practice.
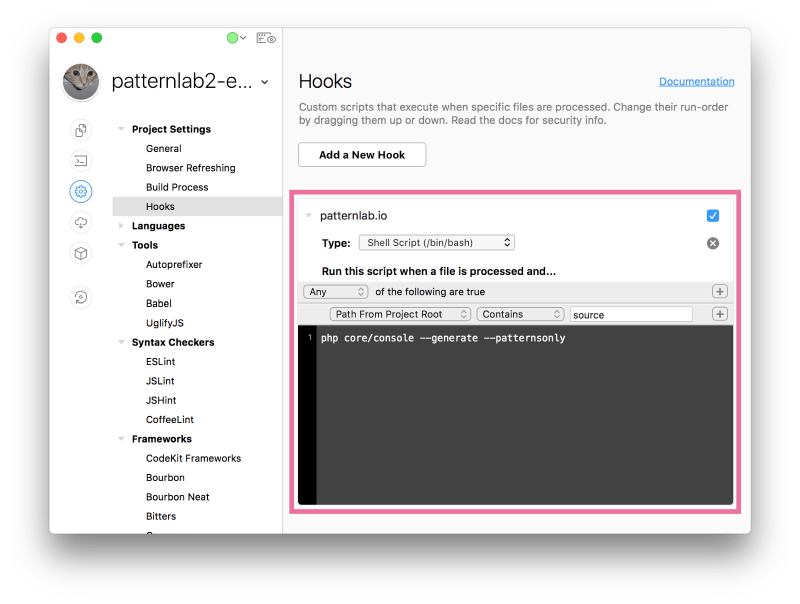
- Set up Hooks. Create a new Hook. For convenience, name it „patternlab.io“.
Set script to be run when a file is processed and Path From Project Root Contains source and paste the following into the script area:
php core/console — generate — patternsonly
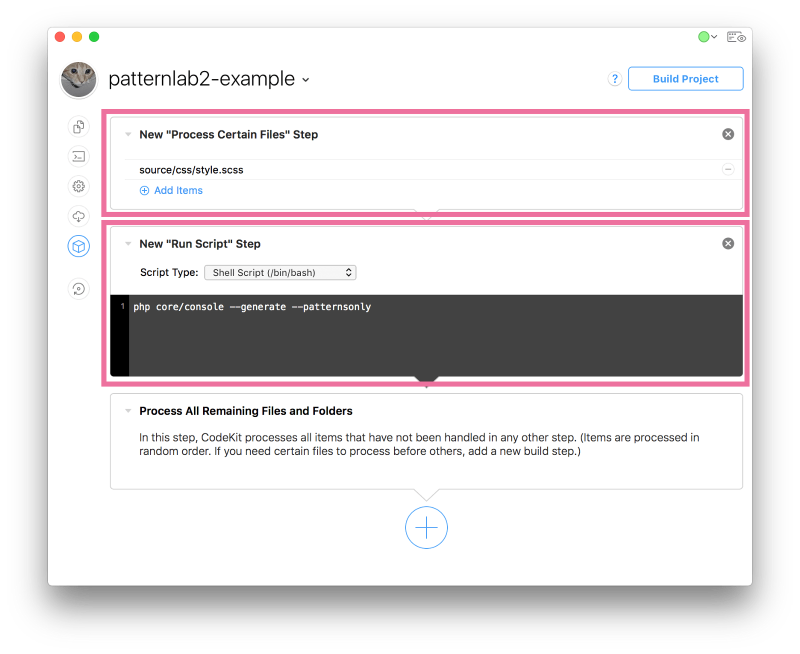
- Set up a “Build” process that is mainly for backup. Usually, Hooks keep everything running smoothly. The order of these steps is essential.
Firstly add the „Process Files“step and select source/css/style.scss.
Secondly, add the „Run Script“step and paste the following into the script area:
php core/console — generate — patternsonly
And that’s it. Happy coding.